SIP Accounts
To use Blink, you need a SIP Account. At first start, Blink shows the window that helps you configure the initial SIP Account.
SIP Accounts
You may configure Blink to use multiple SIP Accounts. To add a new SIP Account, go to menu Preferences->Accounts and click the .
The Add Account window shows up and you can repeat the steps described above.
After you have configured a SIP Account, you can see the status of the registration in the account list of Main window. Solid color means that the account has successfully registered, gray color means that the registration has failed or is in progress.
You can also see the status of the registration in the account list of Preferences window:
Green color means that the account has successfully registered
Red color the registration has failed
Yellow color means that the registration process is in progress.
A successful registration means that you are able to receive incoming calls with Blink.
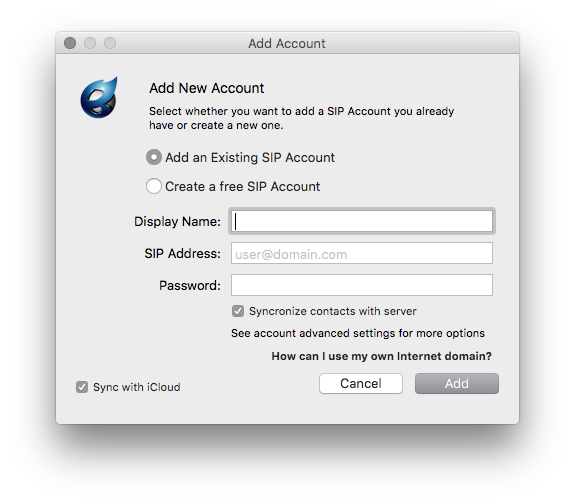
Add an Existing SIP Account
If you already have a SIP account from a SIP service provider, select this option then enter the SIP address in the form of user@domain and the password. If the SIP service provider has set his infrastructure correctly, all server address settings will be automatically discovered by entering the SIP address and password.
Unfortunately, most SIP service providers do not tell their users what their SIP address is. Imagine your email provider giving you an account without telling you what is your email address…
The reason for making things complicated is that SIP service providers are either un-willing or incapable of setting up their DNS and SIP infrastructure correctly and confuse users about how to configure their SIP accounts.
Such providers typically provide separate username and server address information instead of a SIP address. The SIP address is composed by concatenating the username part and the server part format with an @ sign. Additional manual settings for the server address, transport and protocols can be made in Advanced Account Settings explained below.
The username
Different SIP service providers may refer to this in such ways, they are all the same thing:
Username
Account number
Authentication Name
Login name
Phone number
Extension number
Number
The server
Different SIP service providers may refer to this in such ways, they are all the same thing:
Server name
Server address
IP address
Proxy address
Outbound Proxy
Domain
Realm
SIP server
SIP registrar
Concatenate the username part and the server part as follows:
username@server
Create a Free SIP Account
Use this option if you do not have a SIP Account, Blink can create one for you using the free service provided by SIP2SIP. All Blink features are supported by this service.
For more information about the features of the SIP service go to http://sip2sip.info
It is recommended that you always create such account to benefit of the features beyond VoIP provided by Blink. Using a sip2sip.info account you can sync the address book between multiple instances of Blink, bridge to XMPP domains and create multi party conferences.
iCloud sync
The default option is to sync the new account across all computers configured for the the same iCloud account. This means that any changes to any account will be synchronised across all your computers running Blink.
Advanced Account Settings
Outbound Proxy
If the SIP provider does not have proper DNS records set for his domain to point to its SIP server address and port numbers as defined by RFC3263, Blink will not be able to auto-discover its location. In such case you must set the Outbound Proxy setting in Preferences->SIP Account-> Advanced->SIP Signaling. Also you can use this setting to force a specific transport or port different than the ones discovered from DNS.
The outbound proxy format is host.example.com:5060;transport=udp.